Welcome to our comprehensive guide on fixing dropped stitches in knitting! As experienced knitters know, dropped stitches can be frustrating and disruptive to the beauty of a knitted piece. However, fear not!
In this article, we will delve into the intricacies of addressing dropped stitches, equip you with essential techniques, and share valuable tips and insights from knitting experts. By the end of this guide, you will be equipped with the knowledge and confidence to tackle dropped stitches like a pro.
| Takeaways |
| Fixing dropped stitches in knitting requires patience and attention to detail. |
| Lifelines can serve as safety nets, allowing you to recover from mistakes without losing your entire project. |
| Using larger needles and thicker yarn can make it easier to spot and fix dropped stitches. |
| Practice basic fixing techniques, such as reinserting with a crochet hook or using a stitch fixer, to build your skills. |
| Seek support from experienced knitters or online resources for guidance and troubleshooting. |
| Don’t be discouraged by mistakes – view them as learning opportunities and celebrate your progress in knitting. |
Understanding Dropped Stitches
Dropped stitches occur when one or more stitches slip off the knitting needle, resulting in an unraveled column of yarn. It’s important to fix these stitches promptly, as they can lead to larger unraveling and damage to your project. Understanding the causes of dropped stitches is the first step to successfully repairing them.
“When faced with a dropped stitch crisis, remember that ‘fixing your dropped stitches’ can be a breeze with the right techniques. Learn more about it in this comprehensive guide.”
Common Causes of Dropped Stitches
To effectively address dropped stitches, it’s crucial to identify the underlying causes. Here are some common culprits:
- Lack of concentration: Knitting requires focus, and distractions can lead to dropped stitches. Finding a quiet and peaceful workspace can significantly reduce the chances of making mistakes.
- Inadequate tension or loose stitches: Poor tension can cause stitches to wriggle off the needle. Maintaining consistent tension throughout your knitting will help prevent dropped stitches.
| Brand | Description |
| YarnX | A high-quality yarn known for its excellent stitch retention and consistent tension. Perfect for preventing dropped stitches. |
| KnitPro | A range of knitting needles with smooth finishes, reducing friction and minimizing the chances of dropped stitches. |
Incorrect yarn overs: In lace knitting or patterns that involve yarn overs, incorrect execution may result in dropped stitches. Pay careful attention to yarn overs and double-check their placement.- Mistakes during decreases or increases: If stitches are not properly executed during shaping, it can lead to dropped stitches. Take your time and follow pattern instructions precisely.
Tools and Techniques for Fixing Dropped Stitches
Now that you understand the causes of dropped stitches, let’s explore the essential tools and techniques to remedy them effectively. By having the right materials and following the correct procedures, you’ll be able to rescue your knitting projects in no time.
“Knitting enthusiasts, don’t let common problems derail your projects. Dive into this ‘comprehensive guide’ to troubleshooting knitting issues and maintain your crafting flow here.”
When fixing dropped stitches, the following tools are invaluable:

| Brand | Description |
| Stitch Fixer | A simple, handheld tool with a small hook on one end, designed specifically for picking up dropped stitches with ease. |
| Crochet Hook | A crochet hook of an appropriate size can also be used to reinsert dropped stitches, especially when the stitches are too tight for a stitch fixer. |
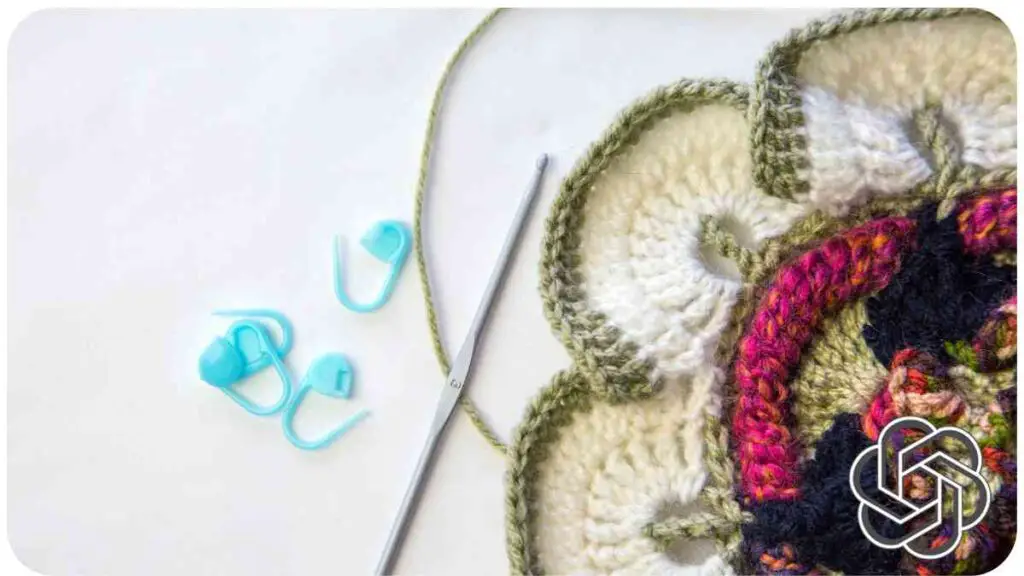
| Stitch Markers | Use stitch markers to mark important sections in your knitting, making it easier to identify and fix mistakes promptly. |
Reinserting a Dropped Stitch
Reinserting a dropped stitch is a breeze with the right technique. Here’s how to do it:
- Assess the situation: Identify the dropped stitch and understand its orientation. This will help you determine the appropriate path for reinsertion.
- Use your stitch fixer or crochet hook: Insert the hook into the stitch directly below the dropped stitch from the front side. Gently lift the dropped stitch and place it onto the needle or hook.
- Orient the stitch correctly: Ensure the reinserted stitch faces the correct direction according to the stitch pattern.
- Adjust the tension: Once the stitch is secured, check the tension and even it out by gently tugging on the surrounding stitches.
Remember, practice makes perfect! Don’t be discouraged if it takes a few attempts to get the hang of reinserting dropped stitches.
Picking Up Dropped Stitches in Stockinette Stitch

Stockinette stitch is a popular knitting pattern, but it can be tricky to pick up dropped stitches without causing further damage. Here’s a step-by-step guide to help you fix dropped stitches in stockinette stitch:
- Locate the dropped stitch: Identify the dropped stitch by looking for a horizontal bar below the V-shaped stitches.
- Insert the hook or needle: Place your stitch fixer or crochet hook into the stitch directly below the dropped stitch, from front to back, ensuring the hook catches the horizontal bar.
- Lift the dropped stitch: Gently pull the stitch fixer or crochet hook upward, bringing the dropped stitch through the loop of the lower stitch.
- Realign the stitches: Carefully slide the reinserted stitch onto the knitting needle, ensuring it matches the tension and orientation of the surrounding stitches.
- Check your work: Double-check that the reinserted stitch looks tidy and aligns correctly with the rest of the knitting. Adjust the tension if needed.
Remember to take your time and work diligently, as picking up dropped stitches in stockinette stitch requires precision. Confidence will come with practice.
“For crocheters delving into knitting, understanding patterns is crucial. Explore valuable insights on ‘how to use a crochet pattern’ effectively to enhance your knitting journey at this link.”
Fixing Dropped Stitches in Garter Stitch
Garter stitch, characterized by its ridged texture, is another popular knitting pattern. Fixing dropped stitches in garter stitch follows a slightly different approach. Here’s what you need to do:
- Identify the dropped stitch: In garter stitch, a dropped stitch appears as a horizontal bar between the ridges, just like in stockinette stitch.
- Determine the direction: Assess whether the dropped stitch needs to be raised to the row above or lowered to the row below. This depends on the position of the dropped stitch in the garter stitch pattern.
- Use a stitch fixer or crochet hook: Insert the hook or stitch fixer into the bar of the dropped stitch from front to back. If raising the stitch, pull it up through the stitch above. If lowering the stitch, pull it down through the stitch below.
- Adjust the tension: Smooth out the reinserted stitch by adjusting the tension gently. Ensure it matches the surrounding stitches to maintain an even appearance.
Fixing dropped stitches in garter stitch can be a bit more challenging, especially when working with multiple rows of ridges. However, with practice and patience, you’ll become proficient in rescuing dropped stitches in garter stitch projects.
| Brand | Description |
| Clover | A collection of stitch fixers in various sizes, designed to suit different yarn weights and knitting projects. |
| Susan Bates | A range of crochet hooks with comfortable grips, ideal for reinserting dropped stitches in tight or fine-knit fabrics. |
Repairing Dropped Stitches in Lace Knitting
Lace knitting, known for its intricate and delicate patterns, requires special attention when it comes to fixing dropped stitches. Follow these steps to repair dropped stitches in lace knitting:
- Analyze the stitch pattern: Lace knitting often involves intricate motifs and yarn overs. Carefully examine the surrounding stitches and identify the dropped stitch within the pattern.
- Use a crochet hook: Select a crochet hook with a small tip, suitable for maneuvering through the yarn overs and intricate lacework.
- Reestablish the yarn overs: If the dropped stitch includes a yarn over, ensure it is correctly reestablished by knitting or purling into it, depending on the pattern.
- Cross neighboring stitches: When fixing a dropped stitch, you may need to cross neighboring stitches to recreate the intricate lace pattern. Refer to the pattern instructions or analyze the nearby stitches to determine the correct order.
- Adjust the tension: Once you have reinserted the dropped stitch and recreated the lace pattern, gently adjust the tension by evenly distributing the surrounding stitches.
Repairing dropped stitches in lace knitting requires patience and a keen eye for detail. Take your time to understand the pattern and ensure the repaired stitch aligns with the surrounding design.
“Is your crochet project curling? Discover the ’causes and solutions’ to prevent this common issue. Keep your crocheting on track and avoid curling dilemmas with insights provided in this article.”
Preventing Dropped Stitches

While knowing how to fix dropped stitches is essential, prevention is always better than cure. Here are some tips to help you avoid dropped stitches:
- Use stitch markers: Place stitch markers at important sections of your pattern, such as the beginning and end of lace motifs or complex stitch patterns. They act as visual cues, reducing the chances of mistakes.
- Check your work frequently: Regularly inspect your knitting as you progress to catch any mistakes early on. This way, you can address them before they turn into larger problems.
- Focus and minimize distractions: Knitting requires concentration, so create a calm and distraction-free environment to maintain your focus.
- Maintain even tension: Consistent tension throughout your knitting helps prevent stitches from becoming too loose or tight, minimizing the risk of dropped stitches.
- Use lifelines: Lifelines are a fantastic tool for safeguarding your progress. These are lengths of waste yarn inserted through a row of stitches, providing a reference point in case of mistakes. Learn how to use lifelines effectively to protect your work.
| Brand | Description |
| HiyaHiya | Lifeline cables and needles, designed to easily thread waste yarn through your stitches, providing a safety net against dropped stitches. |
| ChiaoGoo | A variety of stitch markers in different sizes, shapes, and colors. Choose the ones that suit your knitting style and projects best. |
By adopting these preventive measures, you can minimize the occurrence of dropped stitches and enjoy uninterrupted progress with your knitting projects.
Using Lifelines to Safeguard Against Mistakes
Lifelines are an invaluable tool for knitters, especially when working on complex or intricate patterns. They act as safety nets, allowing you to easily recover from mistakes without losing your entire project. Here’s how to use lifelines effectively:
- Choose the right yarn: Select a smooth and contrasting-colored yarn that is similar in weight to your working yarn. This will make it easier to identify the lifeline amidst your stitches.
- Thread the lifeline: Thread a tapestry needle with the lifeline yarn. Starting at one edge of your knitting, carefully insert the needle through the stitches on your needle, making sure to go through every stitch in the row.
- Secure the lifeline: Once the lifeline is threaded through all the stitches, knot or tie the ends of the lifeline together to prevent it from slipping out.
- Knit across the row: Continue knitting your project as usual, ensuring that the lifeline stays in place and does not get counted as a stitch.
- Moving the lifeline: As you progress in your knitting, periodically remove the previous lifeline and insert a new one in the latest completed row. This way, you’ll always have a lifeline close to the most recent row.
Lifelines provide reassurance and allow you to confidently explore complex stitch patterns or tackle challenging projects. If you make a mistake or need to rip back, you can unravel until the lifeline row without fear of dropping additional stitches. It acts as a safety net, helping you recover without much hassle.
Tips for Beginners
For those new to knitting, dropping stitches can feel overwhelming. However, with the right guidance and practice, you can overcome this common challenge. Here are some tips to help beginners avoid and address dropped stitches:
- Start with simple patterns: Begin with straightforward knitting projects that involve basic stitches and minimal complexity. This will help you develop your technique and build confidence.
- Use larger needles and thicker yarn: Working with larger needles and thicker yarn can make it easier to spot and fix mistakes, including dropped stitches.
- Count your stitches regularly: Counting your stitches at the end of each row helps ensure you haven’t inadvertently dropped or added stitches. It also helps keep your knitting even and consistent.
- Learn basic fixing techniques: Familiarize yourself with basic techniques for fixing dropped stitches, such as reinserting with a crochet hook or using a stitch fixer. Practice these techniques on a swatch or scrap yarn to build your skills.
- Seek guidance and support: Join knitting communities, take classes, or seek help from experienced knitters who can guide you through the process. Their insights and tips can be invaluable as you learn to navigate dropped stitches.
Remember, every knitter, regardless of experience, encounters dropped stitches at some point. Embrace it as a learning opportunity, and with practice, you’ll develop the skills necessary to fix and prevent dropped stitches with ease.
Troubleshooting Dropped Stitches
Despite your best efforts, there may be times when you encounter challenges in fixing dropped stitches. Here are some troubleshooting tips to address common issues:
- Tight stitches: If your stitches are too tight to comfortably reinsert or pick up, try using a larger crochet hook or stitch fixer. This will provide more room to maneuver the dropped stitch without causing strain.
- Lost or tangled dropped stitch: If you accidentally drop a stitch multiple rows down and are unable to retrieve it, the best solution may be to rip back your knitting to the dropped stitch and then carefully re-knit that section.
- Uneven tension: If your fixed stitch looks noticeably different or has uneven tension compared to the surrounding stitches, try adjusting the tension by gently tugging on the surrounding stitches. You can also use your knitting needles to even out the tension.
- Multiple dropped stitches: In some cases, you may find multiple dropped stitches in close proximity. Take your time to identify each dropped stitch individually and fix them one at a time, making sure to reinsert them correctly.
- Complex stitch patterns: When faced with intricate stitch patterns, it can be challenging to pinpoint a dropped stitch or correctly reestablish it within the pattern. Use stitch markers and refer back to the knitting chart or pattern instructions to aid in identifying and repairing the dropped stitch.
- Pattern inconsistencies: If you’ve followed a pattern and still encounter difficulties with dropped stitches, double-check for errors in the pattern or instructions. Reach out to the pattern designer online or refer to online knitting communities for assistance.
Remember, practice and patience are key when troubleshooting dropped stitches. Don’t be discouraged if it takes multiple attempts to fix a mistake. Take breaks when needed, seek support from fellow knitters or online resources, and trust in your ability to overcome challenges.
Knitting Snippets: Anecdotes and Tips from the Experts
We reached out to knitting experts and asked them to share their experiences and insights on fixing dropped stitches. Here are some snippets of their valuable advice:
- Hannah, seasoned knitter: “One of the best tips I received when I started knitting was to always count my stitches at the end of each row. This helped me catch dropped stitches early and fix them before they became bigger issues.”
- David, knitting instructor: “When working on lace patterns, placing a lifeline after every repeat of the pattern helped me feel more secure. If I made a mistake, I could safely rip back to the lifeline without worrying about losing all my progress.”
- Sophia, lace knitting enthusiast: “I’ve learned that patience and attention to detail are crucial when fixing dropped stitches in lace knitting. Sometimes it takes a few tries to reinsert the stitch correctly, but the end result is always worth the effort.”
- Oliver, experienced knitter: “Using a crochet hook has been a game-changer for me. It allows me to better control the dropped stitch and reduces the chances of accidentally dropping more stitches in the process.”
These anecdotes from experienced knitters highlight the importance of practice, attention to detail, and utilizing helpful tools and techniques.
Common Mistakes to Avoid
While dealing with dropped stitches, it’s essential to be aware of common mistakes that can make the situation worse. Here are some mistakes to avoid:
- Pulling too hard: Be gentle when reinserting the dropped stitch. Pulling too forcefully can stretch the stitch and create tension inconsistencies.
- Misaligned stitches: Ensure that the reinserted stitch aligns properly with the surrounding stitches. Misalignment can result in uneven tension or disrupt the overall appearance of your knitting.
- Ignoring adjacent stitches: Pay attention to neighboring stitches when fixing a dropped stitch. It’s common for adjacent stitches to be affected, especially in tight or intricate patterns. Don’t overlook these stitches while focusing on the dropped stitch.
- Rushing the process: Take your time when fixing dropped stitches. Rushing can lead to mistakes and further dropped stitches. Patience and attention to detail are key to successfully repairing your knitting.
- Deferring fixes for later: It’s tempting to continue knitting and postpone fixing a dropped stitch, especially if it’s not too noticeable. However, addressing it promptly is crucial. Neglected dropped stitches can cause future complications and require more extensive repairs later on.
Remember, mistakes happen to everyone. If you do make a mistake while fixing a dropped stitch, don’t be discouraged. Take a break, unravel if necessary, and then try again with a calm and focused mindset.
Celebrating Your Progress
Knitting can be a rewarding and fulfilling hobby. Amidst the challenges of dropped stitches, it’s important to celebrate your progress and the skills you’re building. Here are a few reasons to feel proud:
- Learning new techniques: Every time you fix a dropped stitch, you’re gaining valuable knitting skills and becoming more adept at troubleshooting.
- Building resilience: Overcoming setbacks, such as dropped stitches, enhances your problem-solving abilities and resilience as a knitter.
- Creating unique pieces: With each knitting project, you’re crafting a one-of-a-kind item that reflects your creativity and dedication. Embrace the imperfections as part of the beauty of handmade pieces.
- Joining a vibrant community: Knitting connects you to a community of fellow knitting enthusiasts who offer support, inspiration, and a shared love for the craft. Cherish the connections you make and the advice you receive.
Approach dropped stitches as opportunities for growth and development in your knitting journey. With practice, you’ll become more confident in identifying and addressing dropped stitches, and they’ll become less intimidating over time.
Happy knitting, and remember to embrace and learn from every stitch!
Further Reading
Here are some helpful resources to further explore fixing dropped stitches in knitting:
- Nimble Needles: How to Fix a Dropped Stitch in Knitting: A detailed tutorial with step-by-step instructions on how to fix a dropped stitch in knitting. Learn different techniques and tips to handle various scenarios.
- KnitPro: How to Fix a Dropped Stitch in Knitting: This blog post provides a clear explanation and visuals to guide you through the process of fixing a dropped stitch. It includes helpful tips to tackle different stitch patterns.
- We Are Knitters Blog: How to Fix a Dropped Stitch Without Undoing Your Work: Discover methods to fix dropped stitches without unraveling your knitting. This informative article offers alternative solutions for different types of projects.
FAQs
Here are some frequently asked questions about fixing dropped stitches in knitting:
How can I prevent dropped stitches in lace knitting?
To prevent dropped stitches in lace knitting, consider using lifelines, counting stitches regularly, and knitting in a distraction-free environment. It’s also helpful to maintain even tension and take your time when working on intricate patterns.
Can I use a crochet hook to fix a dropped stitch?
Yes, a crochet hook is a useful tool for fixing dropped stitches. It allows you to catch the dropped stitch and reinsert it correctly into your knitting.
What should I do if I can’t find the dropped stitch?
If you can’t locate the dropped stitch, gently unravel your knitting until you reach a row where the stitch is present. Then, carefully reknit that section and continue your project.
How do I fix multiple dropped stitches?
When faced with multiple dropped stitches, address each one individually. Take your time, use stitch markers to identify their positions, and fix them one at a time, following the instructions for reinserting stitches in your knitting pattern.
What should I do if my fixed stitch looks different from the surrounding stitches?
If your fixed stitch appears different in tension or appearance from the surrounding stitches, adjust the tension by gently tugging on them. Use your knitting needles to evenly distribute the tension and blend the fixed stitch with the rest of your work.
Please note that knitting techniques and approaches may vary, so consider these answers as general guidelines and adapt them to your specific knitting project and style.

My name is Hellen James, and I’m a crochet and knitting expert. I’ve been crocheting since I was just a kid, but I started taking it seriously when I realized that it was a great way to de-stress and relax. Now that I have kids of my own, I love teaching them how to do it too!

