The Joy of Knitting a Scarf
Knitting a scarf is a delightful and fulfilling project that allows you to express your creativity while keeping warm during colder months. Whether you’re a seasoned knitter or just starting out on your knitting journey, understanding how to decode knitting patterns and determine the number of stitches needed is crucial for achieving a beautiful and well-fitting scarf.
In this article, we’ll guide you through the process, sharing valuable insights and personal experiences to help you succeed in your knitting endeavors.
| Takeaway |
|---|
| Learn different stitch patterns for scarves |
| Select the appropriate yarn and needle size for your project |
| Keep track of your tension to maintain consistent stitches |
| Practice blocking to give your scarf a professional finish |
| Troubleshoot common knitting problems with confidence |
| Explore further resources for knitting inspiration and guidance |
2. Understanding Knitting Patterns

2.1 How to Read a Knitting Pattern
Before we dive into the nitty-gritty of stitch counts, it’s important to familiarize yourself with reading knitting patterns. Knitting patterns provide a set of instructions that guide you through each step of creating your desired item. They typically include information about the stitch pattern, required materials, and abbreviations used. By understanding each component of a pattern, you’ll be better equipped to tackle your scarf project.
“If you’re new to knitting, start here for a comprehensive guide on casting on and getting started. Master the foundational techniques to create beautiful scarves and more.”
2.2 Deciphering Stitch Patterns
Stitch patterns are the building blocks of your knitting project, determining the overall look and texture of the finished scarf. It’s essential to choose a stitch pattern that aligns with your desired aesthetics and skill level. Some common stitch patterns for scarves include basic knit and purl stitches, ribbing stitches, lace stitches, cable stitches, and textured stitches. Let’s explore each of these in more detail:
TABLE: Popular Stitch Patterns for Scarves
| Stitch Pattern | Description |
| Basic Knit & Purl | Simple and versatile pattern with alternating knit and purl stitches. |
| Ribbing | Creates vertical or horizontal ribs for stretchy and elastic scarves. |
| Lace | Creates delicate, openwork patterns with yarnovers and decreases. |
| Cable | Creates braided or twisted patterns using cable needles. |
| Textured | Adds visual interest and depth with various knit-purl combinations. |
2.3 Understanding Gauge and Swatching
Gauge refers to the number of stitches and rows per inch achieved with a specific needle size and yarn. It’s crucial to match the gauge mentioned in your knitting pattern to ensure your scarf turns out the correct size.
To determine your gauge, you need to create a swatch, a small sample of knitting using the recommended needle size and yarn. Measure the number of stitches and rows in a four-inch square on your swatch. If your gauge matches the pattern’s gauge, your stitches will be proportionate to the design. If not, try adjusting your needle size until you achieve the desired gauge.
It’s worth mentioning that even if you’re using the same yarn and needles recommended in the pattern, your tension and technique may differ from the designer’s. Thus, taking the time to swatch and adjust your gauge ensures a well-fitting scarf.
“Mistakes happen in knitting, but fear not! Learn how to fix common knitting mistakes with this step-by-step guide. Keep your scarf project on track with these expert tips.”
2.4 Estimating Yarn Requirements
Before you cast on, it’s important to estimate how much yarn you’ll need for your scarf project. Yarn requirements can vary based on factors like stitch pattern, yarn weight, desired length, and width of the scarf.
Most knitting patterns indicate the recommended yarn weight and the approximate yardage required. However, if you’re working on a pattern that doesn’t provide this information, a general rule of thumb is to calculate the yardage based on the expected length and width of the finished scarf, as well as the yarn weight used. Yarn labels often provide information on yardage per weight, helping you make an informed estimate.
By considering factors such as stitch pattern, gauge, and yarn requirements, you’ll be well-prepared to embark on your knitting journey and create a magnificent scarf. Now, let’s move on to choosing the right stitch pattern for your scarf.
3. Choosing the Right Stitch Pattern for Your Scarf

The stitch pattern you select has a significant impact on the overall look and feel of your scarf. It’s essential to choose a stitch pattern that not only matches your preferences but also complements the yarn and suits your skill level.
3.1 Basic Knit and Purl Stitches
The simplest stitch pattern for a scarf involves alternating between knitting and purling stitches. This pattern forms the foundation for various other stitch patterns and creates a classic and clean look. If you’re a beginner, starting with a basic knit and purl stitch pattern is a great way to build confidence and become comfortable with the knitting process.
“Curious about crochet’s time commitment? Find out how long it takes to crochet a dress and gain insights into project duration. Understanding timing is crucial for scarf knitting too.”
3.2 Ribbing Stitches
Ribbing stitches are commonly used to create scarves due to their stretchability and aesthetic appeal. The most common form of ribbing is the 1×1 rib (alternating one knit stitch and one purl stitch). This stitch pattern creates vertical ribs that give the scarf a textured and flexible quality.
If you prefer wider ribs, you can experiment with 2×2 rib (two knit stitches, followed by two purl stitches), or even wider variations. Ribbing stitches are often used on scarf edges or as a central panel, adding both structure and elasticity to the design.
3.3 Lace Stitches
Lace stitch patterns are a favorite among knitters who desire delicate and intricate scarves. Lace stitches incorporate yarnovers and decreases to create openwork designs, resembling intricate lacework. These patterns give your scarf an elegant and light appearance, perfect for accessorizing outfits or adding a touch of elegance to any occasion.
“New to knitting? Start with the basics you need to know. This beginner’s guide covers essential techniques that will set you on the right path to knitting scarves and more.”
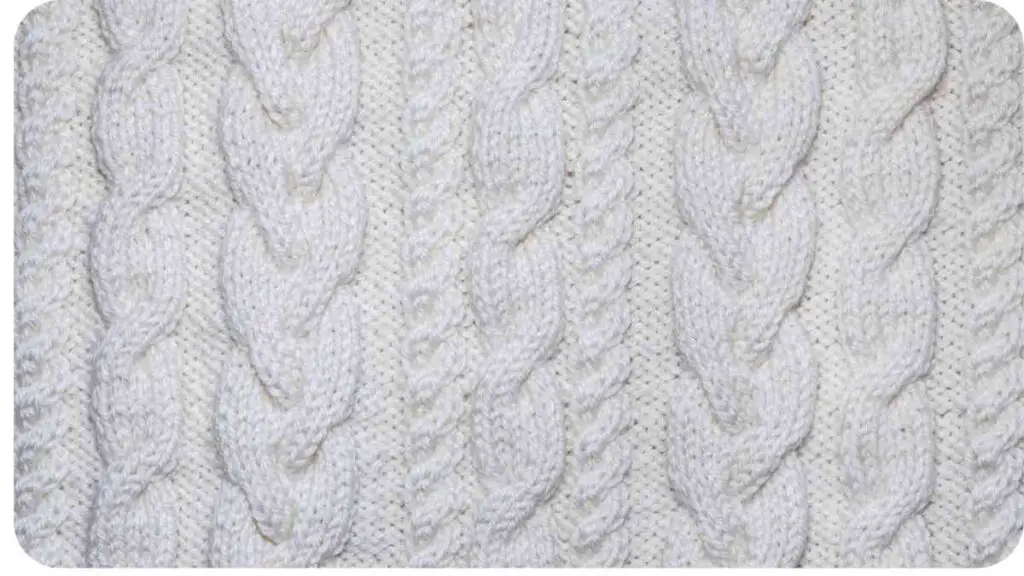
3.4 Cable Stitches
Cable stitches are captivating and add a visually stunning element to your scarf. They involve manipulating stitches to create the illusion of braids or twists. Cables can be simple or complex, depending on the number of stitches involved and the arrangement of the stitches in the cable pattern.
Knitting cables requires the use of cable needles to hold stitches temporarily. This stitch pattern offers a unique texture and depth to your scarf, making it a statement piece, particularly suitable for colder climates.
3.5 Textured Stitches
Textured stitch patterns are versatile and encompass various combinations of knit and purl stitches, resulting in captivating visual and tactile effects. These stitches often involve alternating different stitch patterns to create interest and variety. Textured scarves are cozy and eye-catching, adding a touch of natural charm to your winter wardrobe.
Now that
3.5 Textured Stitches
Textured stitch patterns are versatile and encompass various combinations of knit and purl stitches, resulting in captivating visual and tactile effects. These stitches often involve alternating different stitch patterns to create interest and variety. Textured scarves are cozy and eye-catching, adding a touch of natural charm to your winter wardrobe.
“Although focused on crochet, this guide on crocheting a baby blanket offers valuable insights into creating intricate crochet projects. Scarf enthusiasts can appreciate the craft and detail discussed here.”
TABLE: Examples of Textured Stitch Patterns
| Stitch Pattern | Description |
| Seed Stitch | Alternating knit and purl stitches in a checkerboard pattern. |
| Moss Stitch | Similar to seed stitch but with a 2-row repeat pattern. |
| Garter Ribbing | Combination of garter stitch and ribbing stitches. |
| Basketweave Stitch | Consists of knit and purl blocks to mimic basketweave. |
| Waffle Stitch | Creates a raised, waffle-like texture. |
With such a wide range of stitch patterns available, you can choose one that speaks to your personal style and creates the desired effect for your scarf. Take some time to explore different stitch patterns, and consider how they might complement your chosen yarn and the overall aesthetics you want to achieve.
4. Calculating Stitch Count for Your Scarf
Once you’ve decided on the stitch pattern for your scarf, it’s crucial to determine the appropriate stitch count to achieve the desired width. Here’s a breakdown of the steps involved in calculating the stitch count:
4.1 Determining Scarf Width
Before calculating the stitch count, consider the width you want for your scarf. This will depend on personal preference and the desired functionality of your scarf.
If you already have a specific width in mind, great! If not, a standard width for a scarf is typically around 6-8 inches. Keep in mind that wider scarves provide more versatility in styling, while narrower scarves may be lighter and more suitable for milder climates.
4.2 Converting Stitch Gauge to Inches
To determine the number of stitches needed per inch, you’ll need to convert your stitch gauge, which is provided in the knitting pattern or derived from your swatch, into inches. Measure the width of your swatch in inches and divide it by the number of stitches it contains. This will give you the gauge in inches.
For example, if your swatch measures 4 inches wide and contains 20 stitches, your stitch gauge is 5 stitches per inch.
4.3 Calculating Stitch Count
Once you’ve determined your stitch gauge in inches, you can calculate the stitch count for your scarf. Multiply your desired width in inches by the stitch gauge. This will give you the approximate number of stitches you need to cast on for your scarf.
For instance, if you want your scarf to be 7 inches wide and your stitch gauge is 5 stitches per inch, you will need to cast on approximately 35 stitches.
4.4 Adjusting Stitch Count for Pattern Repeats
If your chosen stitch pattern has pattern repeats, you’ll need to adjust the stitch count accordingly to accommodate the full pattern repeat width. Check the instructions for the stitch pattern to identify the number of stitches in each repeat.
Divide your desired width by the width of the pattern repeat, and then round the quotient to the nearest whole number. Multiply this number by the width of the pattern repeat to determine the adjusted stitch count.
Ensure that the adjusted stitch count is a multiple of the pattern repeat width to maintain the integrity of the stitch pattern throughout your scarf. Adjustments may vary depending on the pattern, so it’s essential to carefully follow the instructions provided.
5. Tips for a Successful Scarf Knitting Project

Now that you’ve determined the stitch pattern and stitch count for your scarf, it’s time to delve into some tips and tricks to ensure a successful knitting journey.
5.1 Blocking Your Finished Scarf
Blocking is an essential step in finishing your knitting project. It involves gently reshaping and setting your finished piece to even out stitches, enhance stitch definition, and give the scarf a professional finish.
Depending on the yarn fiber and stitch pattern, blocking can be done through steam blocking, wet blocking, or a combination of both. Follow the instructions for your specific yarn and stitch pattern to achieve optimal results.
5.2 Choosing the Right Yarn and Needles
Selecting the appropriate yarn and needles is crucial for the success of your scarf. Consider the desired drape, warmth, and texture of your scarf when choosing yarn weights and fiber types. Wool and wool blends are popular choices for winter scarves due to their warmth and durability.
Furthermore, the size of your needles will influence the look and feel of your scarf. Larger needles create looser and more open stitches, while smaller needles produce denser and more compact stitches. Experimenting with different needle sizes can help you achieve the desired effect for your scarf.
5.3 Consistency in Tension
Maintaining consistent tension throughout your knitting project is crucial for achieving a polished and uniform look. Uneven tension can result in stitches that are too tight or too loose, leading to an uneven appearance in your finished scarf.
Be mindful of your tension as you knit, ensuring that your stitches are neither too tight nor too loose. Practice knitting with a relaxed grip and find a comfortable knitting rhythm that allows you to create even and balanced stitches.
5.4 Keeping Track of Rows and Repeats
For patterned scarves, it’s important to keep track of your rows and pattern repeats to ensure accuracy and consistency. Using stitch markers, row counters, or keeping written notes can help you stay organized and minimize mistakes.
If you find yourself getting distracted or interrupted during your knitting sessions, consider placing a removable stitch marker or safety pin at the beginning of each pattern repeat. This will serve as a visual reminder and help you quickly identify where you left off.
6. Troubleshooting Common Scarf Knitting Problems
Even with careful planning and attention to detail, knitting projects can encounter challenges. Here are a few common problems you may encounter while knitting a scarf and some tips for troubleshooting:
6.1 Uneven Tension and Loose Stitches
If you notice that your tension is varying throughout your work, causing some stitches to be tighter or looser than others, try using smaller or larger needles to achieve a more consistent tension. Alternatively, practicing mindful knitting techniques and paying attention to your tension as you work can also help improve consistency.
6.2 Twisted or Dropped Stitches
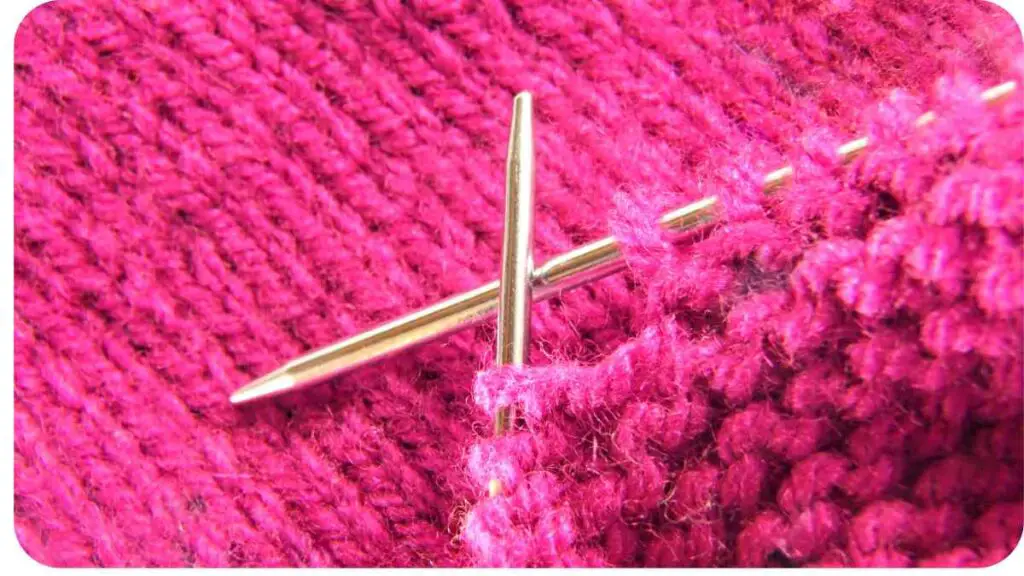
Twisted stitches can occur when stitches are not properly seated on the needle, resulting in a twisted appearance. To fix this, carefully insert the tip of the needle through the stitch from left to right, making sure it is not twisted before knitting or purling the stitch as required by the pattern.
Dropped stitches can be fixed by using a crochet hook or the tip of a knitting needle to catch the dropped stitch and bring it back up through the dropped stitch column. Once the stitch is back in place, continue knitting as usual.
6.3 Wrapping Stitches Correctly
When working on lace or cable patterns, it’s vital to wrap stitches correctly to achieve the intended design. Pay close attention to the pattern instructions and ensure you are wrapping yarn over and under the correct needles when asked. Incorrectly wrapped stitches can alter the pattern and compromise the overall look.
6.4 Fixing Mistakes in Lace or Cable Patterns
If you make a mistake in a lace or cable pattern, fixing it can be challenging. To correct errors, you may need to unravel the affected rows to the mistake and carefully re-knit the stitches correctly. Utilize stitch markers or progress keepers to mark crucial sections within the pattern to make it easier to backtrack if needed.
7. Conclusion
Knitting a scarf is an enjoyable and rewarding project that allows you to explore your creativity and produce a practical and stylish accessory. By understanding how to decipher knitting patterns, choosing the right stitch pattern, calculating the stitch count, and incorporating essential tips and techniques, you can successfully knit a beautiful scarf.
Remember to take your time, enjoy the process, and embrace the opportunity to expand your knitting skills. With practice and perseverance, you’ll create a scarf that showcases your talent and provides warmth and comfort during colder seasons. Happy knitting!
Further Reading
- Knit Picks: How to Knit a Scarf – A comprehensive tutorial from Knit Picks that provides step-by-step instructions on knitting a scarf. It covers various techniques, stitch patterns, and finishing details.
- Ysolda: How to Knit a Scarf – Ysolda’s blog post offers a detailed guide to knitting a scarf, including tips on selecting yarn, choosing stitch patterns, and finishing techniques. It also provides helpful illustrations and explanations.
- Knitting Knowledge: Knitting Stitches – A valuable resource for learning different knitting stitches. This website explains various stitch patterns, provides visual aids and offers step-by-step instructions to help you expand your stitch repertoire and create unique scarf designs.
FAQs
How long does it typically take to knit a scarf?
The knitting time for a scarf depends on factors such as the stitch pattern, complexity, and your knitting speed. On average, a simple scarf can take anywhere from a few days to a few weeks to complete, depending on the time you can dedicate to knitting.
What are some beginner-friendly stitch patterns for scarves?
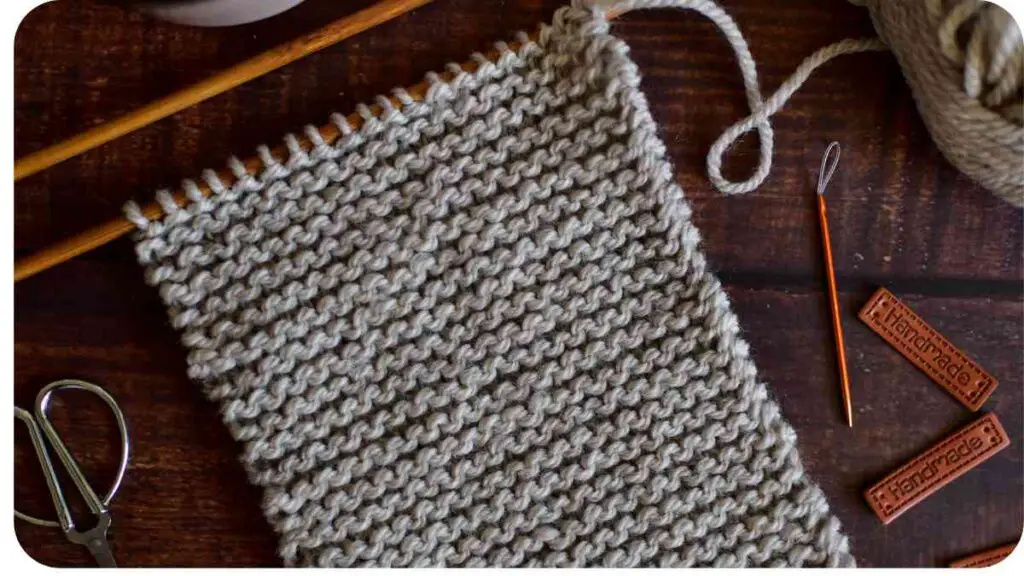
If you’re new to knitting, it’s best to start with simple stitch patterns like garter stitch (all knit stitches) or stockinette stitch (alternating knit and purl rows). These patterns are easy to memorize and provide a solid foundation for practicing basic knitting techniques.
How do I prevent my scarf from curling at the edges?
To prevent curling edges in your scarf, you can incorporate a border such as garter stitch on the edges. Garter stitch has a natural tendency to lie flat, creating a stable border and minimizing curling.
How do I fix a mistake in my knitting?
If you make a mistake in your knitting, you have a few options for fixing it. For minor errors, you can carefully unravel the stitches back to the mistake, fix it, and then re-knit the unraveled section. For more significant mistakes, you may need to unravel the rows and start again from a previous point.
Should I block my knitted scarf?
Blocking is highly recommended for most knitted projects, including scarves. Blocking helps even out stitches, relax the fabric, and improve the overall appearance of your scarf. It is particularly beneficial for lace or textured stitch patterns, where blocking can enhance the stitch definition.

My name is Hellen James, and I’m a crochet and knitting expert. I’ve been crocheting since I was just a kid, but I started taking it seriously when I realized that it was a great way to de-stress and relax. Now that I have kids of my own, I love teaching them how to do it too!

